Web
and Book design,
Copyright, Kellscraft Studio 1999-2016 (Return to Web Text-ures) |
 (HOME)
|
| HOW
TO MAKE A MISSION SHAVING STAND This attractive and useful piece of mission furniture will be appreciated by the person that does his own shaving. The shaving stand can be made at home by a handy man in his spare time as the stock can be ordered from a mill ready for making the joints and attaching the few pieces of hardware. The following is a stock list of materials: 4
posts 1 1/2 in. square by 50 1/2 in.
4 slats 7/8 by 1 by 32 1/2 in. 2 cross rails 1 by 1 1/2 by 15 in. 2 end rails 1 by 1 1/2 by 13 in. 1 top 7/8 by 16 1/2 by 19 1/2 in. 1 bottom 7/8 by 15 by 17 in. 2 ends 7/8 by 12 1/2 in. square. 1 back 7/8 by 12 1/2 by 14 1/2 in. 1 door 7/8 by 6 1/2 by 12 1/2 in. 2 drawer ends 7/8 by 6 by 7 1/2 in. 1 partition 7/8 by 12 by 14 in. 1 partition 7/8 by 7 by 14 in. 7 pieces of soft wood 1/2 by 7 1/2 by 12 in. 2 posts 1 in. square by 10 1/2 in. 1 bottom piece 7/8 by 1 1/2 by 18 1/2 in. 4 mirror frame pieces 7/8 by 1 1/2 by 14 1/2 in. 2 sticks for pins. 2 hinges 1 lock 2 drawer pulls. 1 beveled glass mirror 11 1/2 by 11 1/2 in. While this piece of furniture can be made in any kind of wood, the novice will find that quarter-sawed oak will work up and finish better than the other woods. The stock list given has dimensions 1/2 in. larger in some instances for dressing and squaring where necessary. 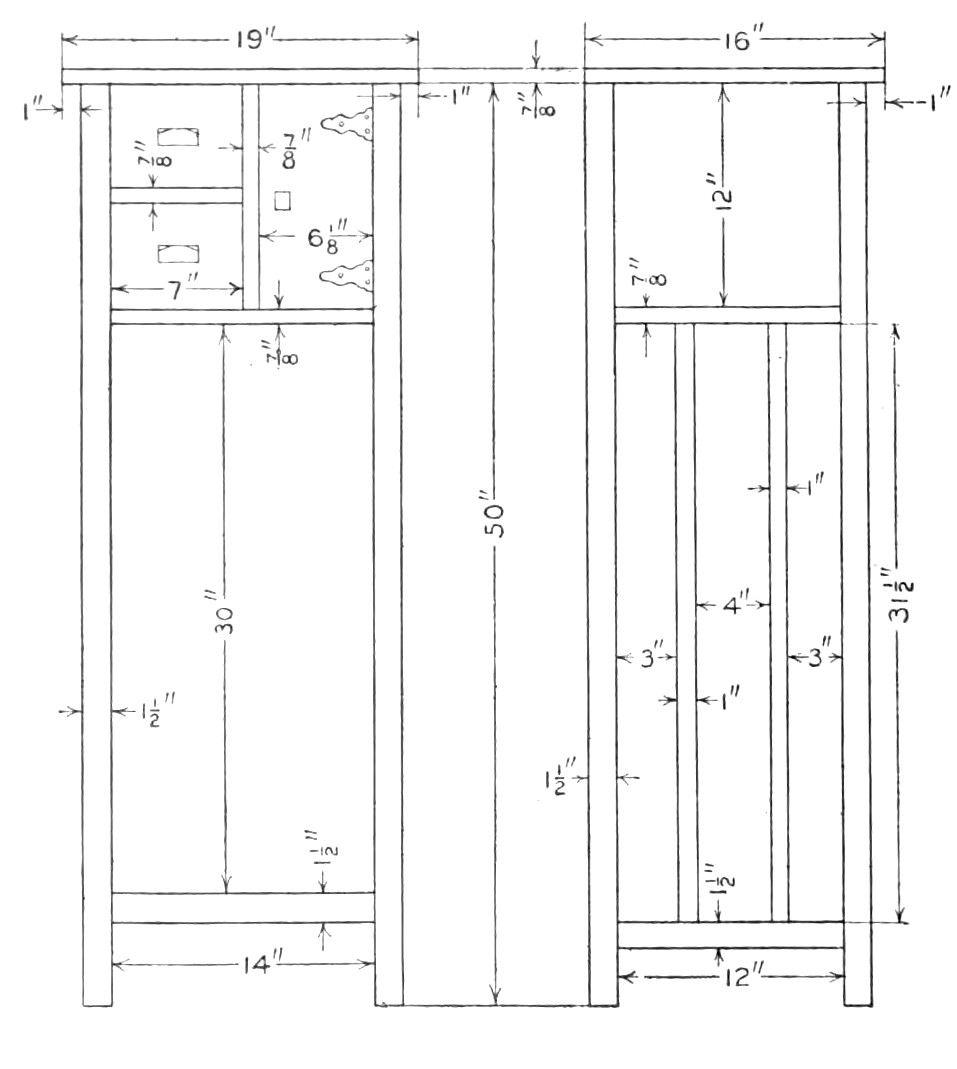 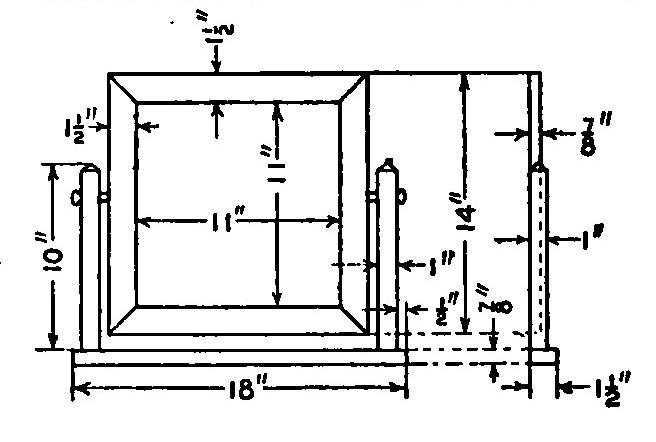 The tenons and mortises are first cut for the cross-pieces at the bottom of the posts, and, as it is best to use dowels at the top, holes are bored in the bottom piece and also the ends of the slats for pins. The bottom piece is also fastened to the posts with dowels. The bottom must have a square piece cut out from each corner almost the same size as the posts. When setting the sides together the end board and posts can be doweled and glued together and after drying well the posts can be spread apart far enough to insert the bottom rail and two slats. The rail and slats should be tried for a bit before putting on any glue, which may save some trouble. After the sides are put together, the back is put in and glued. The top is then put on and fastened with cleats from the inside. The partitions are put in as shown and the door fitted. Two drawers are made from the ends and the soft wood material. The drawer ends may be supplied with wood pulls of the same material or matched with metal the same as used for the hinges. The pieces for the mirror frame must be rabbeted 1/2 in. deep to take the glass, and the ends joined together with a miter at each corner. The two short posts are tenoned and mortises cut in the bottom piece for joints and these joints well glued together. The bottom piece is then fastened to the top board of the stand. This will form the standards in which to swing the mirror and its frame. This is done with two pins inserted in holes bored through the standards and into the mirror frame. After the parts are all put together, cleaned and sand-papered, the stand is ready for the finish. 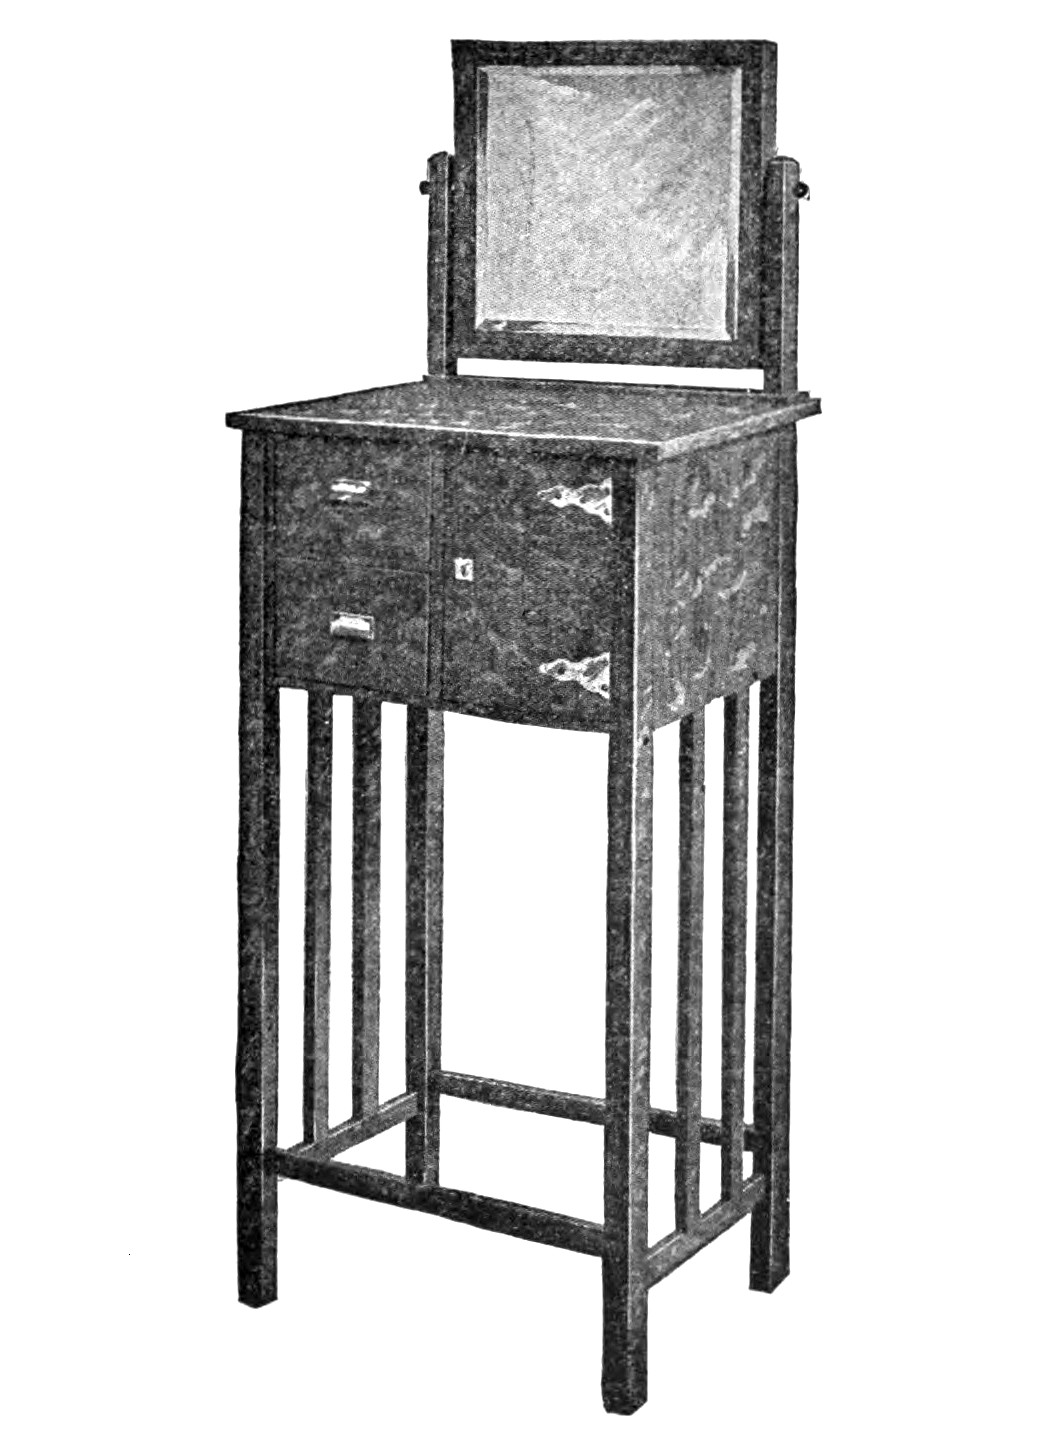 Shaving Stand Complete |
Web and Book design,
Copyright, Kellscraft Studio
1999-2016
(Return to Web Text-ures)